Plans To Create Octagon Gazebo - Facts To Be aware of While Making A Outdoor Gazebo

The nuts went to the inside of the structure, where they were less visible. Then the landscapers added the pavers around it. These independent structures allow you to carve out your own space, giving you a garden nook of sorts to read, relax, and unwind in the summer months. When done incorrectly, it can cost you thousands in home repairs. Find a good set of plans for your gazebo. You would be able to enjoy the warm breeze of your outdoor (https://pergoladrafts.com) space as you read your book or lounge outside in a comfortable chair. If you could dig holes, and make straight cuts through a board, you can build this simple pergola.
Glue and screw the front seat joist against the intersecting back seat joist. Install the front and rear struts first, fastening them to the face of the support columns above the girder. We also screwed those in with 4 inch screws. The 2x10 headers are then connected and bolted to the 4 end supports along with their metal straps. They add strength and a beefy look to the finished pergola. You can trim the ends into your preferred decorative designs. The size of the boards will of course depend on the desired size of your gazebo. At this point, we added some more gravel all around the structure, to drain away any water during the winter and keep it nice and neat.
Damp, stagnant air trapped under the summerhouse will attract insects and promote rot. Building a pergola is a lot simpler than it seems. For this step, you would need an (have a peek here) assistant. Grow vines over a pergola, or add lattice to its top to make a shady summertime picnic area. Let the finish dry for a day before using the shelter. Before you screw the second one in, check for squared level posts. It also goes to show you don't need many fancy power tools to build your own shed or summer house. Read the manufacturer's instructions for a tight fit.
Any help on that will be appreciated. In addition, make sure the corners are right-angled, by applying the 3-4-5 rule to each corner. Snap chalk lines between the marks at the house and the patio edge. After you have chosen what your base is gonna be made of, it's time to scout a flat surface that you will lay your foundation on. Or, you can choose a retractable option that allow you to use the screens when necessary. The hub is the piece of lumber that goes to the very top of the summerhouse roof. Use the girders as a guide to help you mark out the post holes.
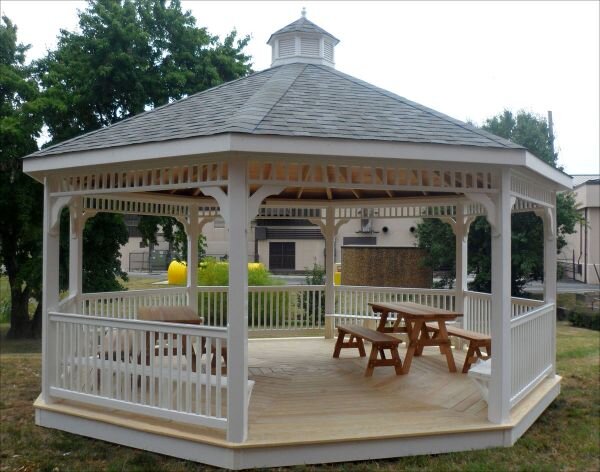
Although this is a natural occurrence it still causes damage in wooden summer houses, but you can help prevent it through regular treatment. The flat lattice on top is perfect for holding climbing plants and flowers but also looks lovely when empty. Level the timbers if necessary by adding or removing gravel. You could also drive some wood stakes along the outside of each timber frame to keep it in position while you pour concrete. The easiest way to lay out the octagon is to make a square and to cut the corners until you obtain the desired shape. As a result it would last without the need for chemical treatments.
Mark the place where the posts overlap the batten and cut it out. Make sure you also install the appropriate drip edges, so you can seal the shed roof. This particular model has an aluminum frame and a convertible top which could be manually opened and closed. There is a bit of guesswork in the bench frame, a lot of measuring and fit up before making final cuts. Your going to want to get some Simpson saddles. Then you need to cut the top of the girders at 47 degrees, so they can fit to the hip eaves properly. Place the first batten at the very edge of the construction, making sure the sides are flush.
To integrate a pergola into the existing landscape, they're usually built square to the house or the nearest structure. Set the columns in position and temporarily brace them. Read this to learn how to build a pergola in your yard. Summerhouses are the perfect place to relax at the end of the day, make the perfect hobby space and could even house overnight guests. Screw the roof eaves in place according to the directions provided in your kit. Take your balusters and place them between two long boards.